As an Amazon Associate we earn from qualifying purchases.
Let’s face the facts as a drummer, you not only create music but also take care of the equipment. The drums are prone to get dusty over time, and cleaning it takes hours! However, here is an easy solution, the breakdown of steps on how to clean the drum heads.
Contents
How to Clean Drum Heads
A drum set is an expensive musical instrument, and it must be taken care of well. Taking care of drum heads includes changing the skin, keeping the drum in tune, and cleaning it often.
Cleaning Drum Heads: Things to Remember
Cleaning is not just about dusting the drum heads, and it has more to it. Learning more about your equipment allows you to understand how to clean the drum set.
Drums are an amalgamation of different small pieces, which compose a single tune. To keep the drum in good condition, each of the pieces should be squeaky clean.
- No to abrasive cleaner– Similar to cleaning vinyl records, abrasive cleaners are harmful and can damage the drum heads. It is incredibly crucial that you avoid abrasive cleaner.
- Never use bathroom cleaner- Bathroom cleaners have a high amount of toxic chemicals which can damage the surface of drums.
Materials Required
- Duster
- Cleaning spray
- Microfiber cloth
- Vinegar
- Alcohol
- Mayonnaise
- Sponge
Step 1: Dust It Off
- Use a microfiber cloth to dust the dirt and grime from the drum heads.
- A simple duster and conscious-driven dusting will do the work.
- It is not advisable to do the dusting vigorously as it can scratch the surface of the drum heads.
- Wood chips are common on drum heads as they break from the sticks after hours of playing. The chip gets stuck in the crests of the drums. It is advisable to do dusting once in a while.
If you can’t get out the wood chips from the duster, use a vacuum cleaner to get rid of bits of chips.
Step 2: Wet Clean
After dry cleaning the drum heads, it is essential to get to the next wet cleaning step.
- Use a damp towel and clean any dirt build-up from the drum heads.
- Take a slightly damp cloth and move it in a circular motion. Never do it before removing the wood chips, thereby avoiding scratches.
- It is the safest option to go by if you are having flummoxed thoughts about harsh chemicals.
This process helps in cleaning the dirt from drum heads a little bit more than dry dusting.
Step 3: Apply Dishwash
If water doesn’t work, then move to this step.
- Mix one tablespoon of dishwashing solution with a bowl of warm water.
- Use the sponge to scrub the drum heads. Moisten the sponge and apply it to the drum heads.
- Never use an ammonia-based cleaner, as the drum heads are made of plastic; it can cause harm to the plastic.
- Scrub the drum heads gently with dishwasher gel, and then rinse them off with water.
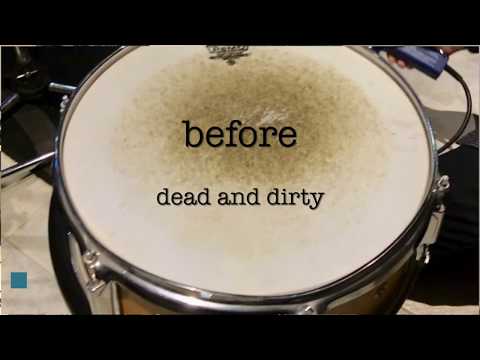
When this method does not work, move ahead to the next step, which focuses on the strong cleaning of the drum heads. Here is a video guide to clean the filthy drum heads.
Step 4: Use Diluted Vinegar
Vinegar is a known cleaning agent which cleans hard stains and grime from the surface. In addition, the acidic nature of vinegar is known for its cleaning effectiveness.
- Dilute the vinegar with water and apply it to the drum heads.
- Damp a cloth and then start rubbing the diluted vinegar to the drum heads.
- It cleans the mark or stains made by drum sticks; it also cleans the dirt and dust from the corner of the drum, which is attached to the drum head.
- Keep scrubbing gently until the stain comes out. Then damp the cloth in normal water. Next, clean the vinegar solution from the drum head with the help of the damped cloth.
- Keep rinsing until the vinegar comes off, although the foul smell remains on the drum for a day or two.
- Never leave vinegar for a long period; it can harm the structural integrity of the drum head.
Step 5: Use Alcohol
Alcohol is one of the standard cleaning methods for dirty drum heads. These are used to clean the residue of the muffling technique.
Drummers often put moon gel or tape over the drum while performing in live shows. Unfortunately, the sticky residue stains the drum heads.
- Use rubbing alcohol over the drum heads, and leave it for 15-20 minutes.
- Work the rubbing gel with a soft cloth and keep scrubbing until the sticky residue comes out.
- You can also scrape the residue with blunt edges.
The sticky residue can become a hurdle in your music jams; make sure you clean it after the show; otherwise, it becomes difficult to clean.
Step 6: Mayonnaise
Before jumping into some manufactured hard cleaning agent to clean drum heads, apply mayonnaise on the surface of drum heads.
- Apply some amount of mayonnaise on the drum heads.
- Mayonnaise has plenty of fat that acts as a lubricant; use it to clean after muffling technique.
- In addition, the greasy paste helps in cleaning the sticky residue from the drum heads.
After cleaning, rinse the mayonnaise from the drum heads. It is a simple and quick way to remove stains from drum heads.
Step 7: Other Powerful Lubricants
Lubricants are definitely the best option to clean the drum heads. Some factory-manufactured lubricants like Goo-Gone, WD-40 are famous for their cleansing properties.
Preventive Measures for Cleaning Drumheads
There are some preventive measures you must take while cleaning drum heads. These measures can prevent damage and allows you as a drummer to make an informed choice for cleaning drum heads.
The best cleaning method is to protect the drum layer to avoid getting stained and dirty. Dust off the first from the drum every day; it would prevent dirt and grime build-up.
Another technical method you can incorporate while playing the drums can save time and money cleaning the drums. When you play the drum, instead of hitting it on the corner, hit straight into the middle of the drum. This tones up the volume and keeps the drum clean.
Also, you should cover the tip of wooden sticks with a nylon cover. The lamination on the sticks ensures fewer stick marks, and next time you clean, you won’t have to worry about stick stains.
Maintenance of the Drum Heads
Cover It Up
The drums get dusty and dirty when left unused. A drum loses its shine when it gets covered with layers of dust. To keep it clean when not in use, you can wrap or cover the drum heads with a cloth.
Take a thick cloth with interwoven fabric design and lay it off on the drums. This ensures the extra dirt won’t harm the surface and prevent scratches on the surface.
Wipe It Down
Once in a while, you should use grease cleaner and clean the entire drum collection with the solution. After deep cleaning the drums, use drum polishing to polish the surface and make it look new.
Never Scratch the Surface
While cleaning the drums, always remove the dust with a microfiber cloth and vacuum the remaining dust from the drum heads. This ensures, while cleaning the stains, the surface won’t get scratched with dirt.
Lube the Bearing Edges
When it comes to maintaining the drums, you must lubricate the bearing edges. This helps in fine-tuning and ensures the drum is in good shape.
Here are some other maintenance procedures that you can follow to keep your drum heads squeaky clean.
Frequently Asked Questions
How Do I Take Care of Drum Skin?
Moisturize it well, and it is the best method to keep the drum skin protected. Apply drum polisher, oils, and lubricants to moisturize the drum heads. If it is too dry, you can use coconut oil, palm oil, or linseed oil. Mix it with mineral oil like lavender to bring moisture and a soothing smell to the drum skin.
How Can I Disinfect the Drum Heads?
Use rubbing alcohol with 70% alcohol, or use disinfecting wipes to clean and disinfect the surface. When drums are used by many, you must disinfect them; this way, you can prevent the germs from growing overtime on drum heads.
How Often Should I Clean Drum Heads?
Drum heads get dirty when used regularly. So deep clean the drums once a month if you use them regularly. While, if you like playing it once in a while, then clean it every six months.
Conclusion
The drums are designed to get hit, which means they would have marks and stains on them. Cleaning the drum heads occasionally ensures the drum head lasts long. The real challenge while cleaning the drum heads is to clean the marls from the stick.
In this article, we have explained the methods for light and heavy cleaning. It would help you in finding the best cleaning solution for drum heads.