As an Amazon Associate we earn from qualifying purchases.
Everybody desires an excellent shiny drum set, as it gives you a different type of environment and motivates you to play your best tunes. But cleaning a drum set might seem like a challenge as it is massive and has a complex composition. Thus, the question arises of how to clean a drum set in the best way possible.
Contents
How To Clean A Drum Set
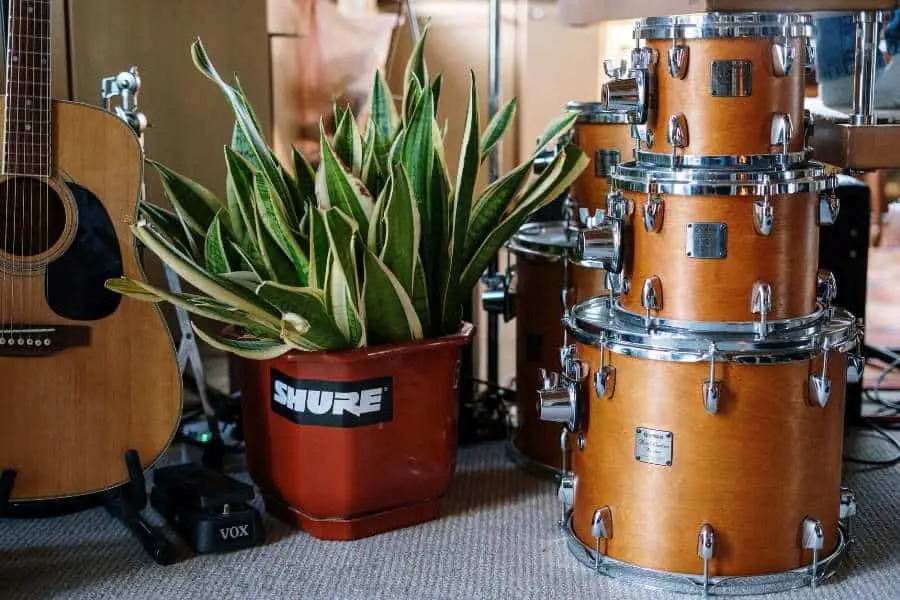
A shiny drum set is attractive to the audience; thus, keeping it clean is the drummer’s responsibility as it shows that you respect your instrument. Likewise, if you appreciate your instrument, the music will respect you. Hence here are the steps you need to follow to keep your drums in the best shape possible.
Materials Required
Wiping off the dust might take a few seconds, but dealing with the debris is not that easy.

You will need your cleaning ammunition to get the best results. Here is the list:
- A microfiber cloth or a terry
- A one-inch brush
- A 0.5-inch brush
- A wood conditioner or polish (lemon oil)
- A non-abrasive chrome polish
- A mild lubricant for the moving parts
- Some masking tape
- Petroleum jelly
Step 1: Disassembling Your Drum Set
The first and the primary step to deep cleaning is disassembling your drum set. It will give you a proper space, and each inch of the drum set will be thoroughly cleaned.
- Start with loosening up each part of the drum set and group them accordingly so that none of the parts get lost.
- Make sure you separate the metal and the wood parts, as a different method is used to clean depending upon the nature of the material of the parts.
Here is the link to a video guide showcasing how to disassemble a drum set and reassemble it after cleaning.
If you avoid this step, the shine that you desire might not be achieved.
Step 2: Brushing Off The Rims
Once you are done with disassembling the drum set, you need to move forward with the next step, brushing off the rims. Here are the steps you need to follow:
- Take your one-inch brush and start removing the chipped wood pieces from the rims of the drum set.
- Go for a 0.5-inch brush if there are nasty pieces of debris stuck around the rims, as they won’t go off easy with a 1-inch brush.
- You need to follow this step with your toms and the snare drum.
Here is the link to the study about snare drum written by Vic Firth; it concentrates on the methodology followed in the classical and modern form of music, keeping in perspective the usage of the snare drum.
Step 3: Polishing The Rims, Cymbals, And Hardware
After brushing off the dust from the rims, it is time to move forward with polishing the rims, cymbals, and hardware.
Again, avoid using any type of non-abrasive polish on the wooden parts, as it might compromise the quality of the wood on the drum set.
- Cover the wooden parts with masking tape, take some non-abrasive chrome polish, and dispense a little amount on the terry or microfiber cloth.
- Now take the microfiber cloth and start spreading the polish gently on the metal parts of the drum set.
- Make sure the polish is spread evenly, and use an extra amount if needed. Once you are done spreading, clean the polish with a clean terry or microfiber cloth, it will give the metal parts a good shine.
- Follow the steps mentioned above for the top rims, bottom rims, cymbals, and other drum set hardware. Do not use this method on the snares.
- Keep an eye on the tight spaces and make sure the polishing cream does not get assembled in the tight spaces and leave nasty stains.
Here is the link to a study highlighting the features of microfiber cloth and why it is best for cleaning various materials such a the surface of a tinted window and titanium rings.
Step 4: Polishing Your Toms, Snares, And Bass Drum
Once you are done polishing the rims, cymbals, and hardware of the drum, it is time to put your focus on polishing your toms, snares, and bass drum.
Here are the steps that you need to follow:
- Since a non-abrasive polish cannot be used on the wooden parts, take a different microfiber cloth for the wooden parts of the drum set.
- Now remove the masking tape that you used to cover the wooden parts of the drum set.
- You can use any wooden conditioner or a lemon oil polish that gives the wood a good protective layer for the wooden parts. Lemon oil is a better option, as it does not leave any uneven stains.
- Dispense a little oil on the microfiber cloth and start spreading on the wooden parts of the drum set.
- Once the oil is evenly spread, take clean terry or microfiber cloth and remove the excess oil from the surface. You will see that good lustrous look after the clean wipe.
Wooden parts are a bit sensitive to deal with; make sure you use mild products and a good brand.
A wrong product can compromise the quality of the wooden parts that, in short, deteriorates the quality of the whole drum set.
Step 5: Reassembling Your Drum Set
Once the cleaning and polishing are done, it is time to move forward with reassembling your drum set.
After cleaning, it is more of a challenging part to build the whole drum set back.
Here are the tips and tricks that you need to follow before reassembling the drum set:
- Make sure you use some petroleum jelly on the lug screws. It will help in preventing any cross-threading while reassembling.
- While reassembling the drum set, make sure each part is carefully tightened to make it fit correctly. Each screw should be finger-tight.
- Next, gather some appropriate tools to reassemble the hardware of the drum set.
- Once you are done with the tightening and assembling, make sure you do not leave any fingerprints on the drum set. Give a quick clean with a microfiber or terry to ensure the quality.
Step 6: Tuning Your Drums
During the cleaning process, you might have detuned your drum set. Hence, make sure that you properly tune your drum set before playing.
Also, do not forget to take a selfie with your drum set after such hard work.

Pro Tips and Tricks For Maintaining A Clean Drum Set
Cleaning a drum set is an exhausting process. Thus it is impossible to clean it now and then.
Thus, maintenance is the key; here are some pro tips and tricks for maintaining a clean drum set:
- Make sure to add a packet of dehumidifiers inside the toms, bass drums, and the snare when you change the drum skin.
- If you are using steel wool to clean your hardware, use a polishing grade like #0000, as more course grades will result in scratches and might throw a bit of debris.
- Place your drum sets in dry and cool areas to avoid mold and mildew, as they form at a thriving rate in moist environments.
- Make sure the inside of your drum is arid. Otherwise, an organism might start living in your drum set, and nobody wants that.
Drum sets expect a lot of physical effort when cleaning and maintaining the quality of the instrument, but it is all worth it, as a lustrous and shiny instrument can produce the best music.
Frequently Asked Questions
How Can One Know If The Drum Set Is Good?
Here are few points to look out for a while buying a good drum set. First, find a balance between the cost and the quality of the drum set. Keep a good eye on the hardware of the drum set, make sure it is solid, and prefer buying a bundled hardware.
How To Take Care Of An Electronic Drum Set?
Taking care of an electronic drum set is pretty easy. Always clean with a soft cloth. In case of stains, use a damp microfiber cloth for cleaning. Do not use alcohol-based products on the module. Avoid placing any vinyl products on the module.
Conclusion
A deep clean of the drum set might take a huge chunk of your day, but it is necessary to clean your drum set at least once a month to maintain its quality. If you cannot afford a monthly cleaning session, make sure you follow the steps in parts. It will ease up your cleaning hours and maintain the quality of the instrument as well.
In addition, a regular cleaning session can save you from that long day of physical effort.