As an Amazon Associate we earn from qualifying purchases.
Who doesn’t enjoy a holiday meal? One of the best parts of the holiday meal is the turkey. People look forward to the holidays so they can eat delicious turkey with their family and friends. However, to make a good turkey, the meat must be thoroughly cleaned. Thus, in this article, we will discuss how to clean turkey necks to enjoy clean and delicious meat.
How to Clean Turkey Necks?
Cleaning a turkey is one of the most difficult tasks, especially when it comes to cooking and eating a wild turkey. We recommend buying a pre-packaged turkey to cut down on cleaning time. We’ll go over each step in detail so you know what precautions to take and what tools you’ll need for cleaning.
Step 1: Thaw the Turkey Before You Start Cleaning
If you are not going to cook the turkey right away after purchasing it from the store. Thawing your turkey before cleaning will improve the texture of the meat after cooking.
Here are the steps you need to follow:
- Place the turkey in a plastic bag and seal it.
- Fill a bucket halfway with cold water and completely immerse the turkey in it.
- Make sure the water is changed every 30 minutes.
- You can also thaw the turkey directly in the microwave by setting it to defrosting mode.
If none of the above methods appeal to you, you can chill the turkey for at least 24 hours. Here are some precautions you should take:
- Make sure the plastic wrap is airtight if you’re thawing the turkey in cold water. Water should not get into the wrap.
- Thaw it in the refrigerator for at least two days before cooking.
- Make sure your hands are perfectly washed before you start handling the turkey. Tie up your hair and wear rubber gloves for protection.
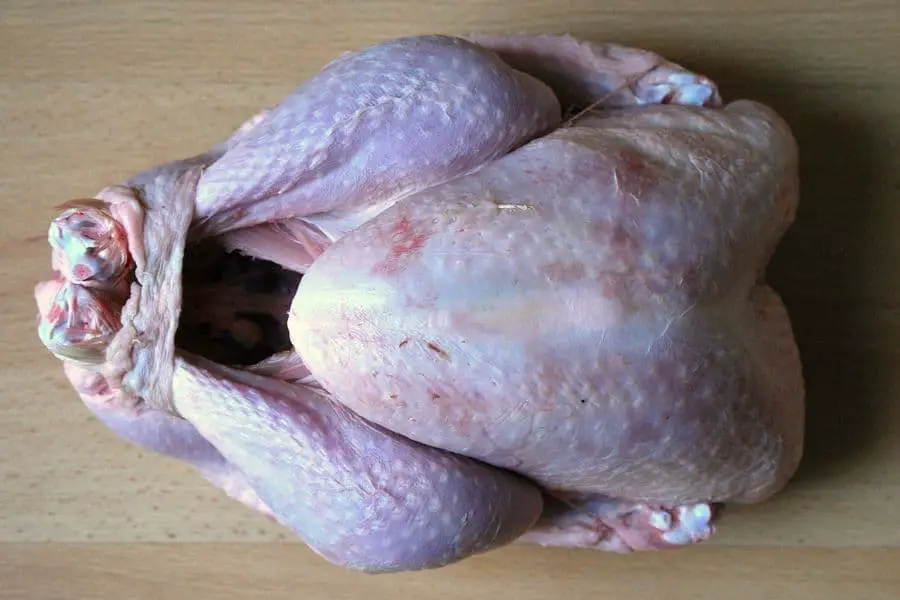
Step 2: Removing the Packaging and Placing Turkey in the Baking Dish
When the turkey has finished thawing, remove the packing and place it in the baking dish. Remove the packaging without damaging the skin of the turkey, then carefully remove it and place it on the baking dish.
Here are some pointers for consideration during the process:
- Keep the turkey away from the surfaces. The more surfaces the turkey comes into contact with, the more cleaning will be required.
- Ensure that the turkey juices do not come into contact with any of the other food. If there is an accident, throw away the food.
There is one exception to this rule: the food that is supposed to be cooked inside the turkey does not need to be discarded if it comes into contact with the turkey.
Step 3: Removing the Neck and Giblets From Turkey
After removing the packaging and placing the turkey in the baking dish, it is time to remove the turkey’s neck and giblets.
- Hold the turkey in your hands to keep it still.
- Now, using your other hand, carefully reach inside the turkey and remove the neck and giblets, leaving the inside hollow.
You can choose to cook the turkey’s neck and giblets. Here’s a link to a video that highlights the amazing recipe for cooking turkey neck and giblets.
Step 4: Rinsing the Inside of Turkey
Once the neck and giblets have been removed, it is time to rinse the inside of the turkey.
The following are the steps you must take:
- Start by emptying your sink if you intend to cook a brined turkey.
- Take a bowl and fill it with hot water and a few drops of organic soap using your thermocouple water heater.
- Now, take a soft brush and soak it in soapy water before cleaning the inside of the turkey.
- Now fill the turkey with some cold water ( 2- 3 inches) and rinse the turkey’s cavity with some hot steam.
- Once the cavity is cleaned, drain the water out from the turkey and place it on the roasting pan.
You do not need to wash the turkey outside if you are not cooking a brined turkey. This is because cleaning the outside of poultry animals does not help to remove bacteria.
Here are some tips to keep in mind as you clean the inside of the turkey.
- Make sure the roasting pan is kept next to the sink to avoid any extra mess.
- Cover the surrounding area with paper towels to avoid any spills on your floor.
This is one of the most crucial steps in hygiene; thus, make sure you take your time while going through the process.
Step 5: Washing the Areas Touched by Turkey
Many juices are secreted from the body while cleaning the turkey and removing the head and giblets from the body. That juice is loaded with bacteria.
As a result, you must begin washing the areas touched by the turkey to ensure that the hygiene of the kitchen and other eatables is not jeopardized.
Here are the steps you need to follow:
- Start with washing your own hands and forearms with warm water and soap. Wash for at least a minute to make sure the bacteria is removed.
- Fill a bowl halfway with hot water. Add a few drops of liquid soap and thoroughly combine.
- Take a scrub brush and begin cleaning the sink, shelf, and other utensils touched by the turkey.
- All edibles touched by the turkey should be discarded because they are cross-contaminated.
This step is required to ensure the safety of the kitchen as well as the family members. Meat can be a source of a variety of diseases, so we must eat clean meat.
Here are some pointers that you might want to consider while cleaning:
- For added protection, spray the kitchen with an organic disinfecting liquid.
- You can also make one by rubbing bleach and water on the kitchen surface. Before using the kitchen, make sure to clean the bleach coating.
Plucking a Clean Wild Turkey
The mechanism described above works well for store-bought turkeys, but this method of cleaning wild turkeys will also work well. Here’s how to go about getting a clean wild turkey.
- If you are planning to roast or deep fry your turkey, start with plucking the turkey’s feathers with your bare hands. Make sure you wear rubber gloves.
- Now take a sharp knife and remove the head and neck of the turkey; you can also remove the wings if you like. Make sure you leave the drumstick shape after cutting.
- Now heat a large pan at 66C and dip the turkey into the water for at least 30 seconds to make the plucking easy.
- Take a strong rope and hang the turkey at head height. Now start to pluck the feather, taking a few at one time.
- Once the turkey is entirely plucked, take a knife and remove the turkey’s innards for clean meat.
- Now you can start separating the body parts of the turkey if you want to cook separately.
If you want to save time cleaning and cooking, buy a store-bought turkey. Dealing with a wild turkey necessitates some effort.
Frequently Asked Questions
What Will Happen if You Forget to Rinse Turkey While Cleaning?
If you are cooking roasted turkey, there is no need to rinse the turkey at all, but if you cook brined turkey, you cannot miss this step at any cost, as food cooked inside the turkey can spread bacteria if not rinsed. Here is what will happen if you forget to rinse the turkey while cleaning.
How Long Will It Take for Turkey to Unthaw in the Refrigerator?
For every 5 pounds of frozen meat, the turkey should be thawed for at least 24 hours. So a 20-pound turkey will need to be thawed for four days. Keep an eye on the turkey while it’s in the fridge to see if it needs to be drained. Here’s how long it will take for the turkey to defrost in the refrigerator.
Conclusion
Cleaning the turkey necks may appear to be a lot of work, but once you taste the delicious meat after cooking, all of your efforts will be rewarded. It could be easier than cleaning sheepshead and grouse.
Make certain that the kitchen’s hygiene is not jeopardized at any cost. Keep your kitchen organized and disinfected during the cleaning process to keep the mess to a minimum.